


When you enroll in the iPhone developer program, you’ll have access to iTunes Connect, now click Manage Your Apps. On the next screen, click the blue Add New App button.
Select the bundle ID that corresponds to the app that you want to submit and type in an app name. The SKU Number is just for your own reference or cataloguing. Just like products that you buy in a store have a barcode, this app SKU number is like that and is used for your own purposes to identify your product. After you’ve filled in the information, click Continue.
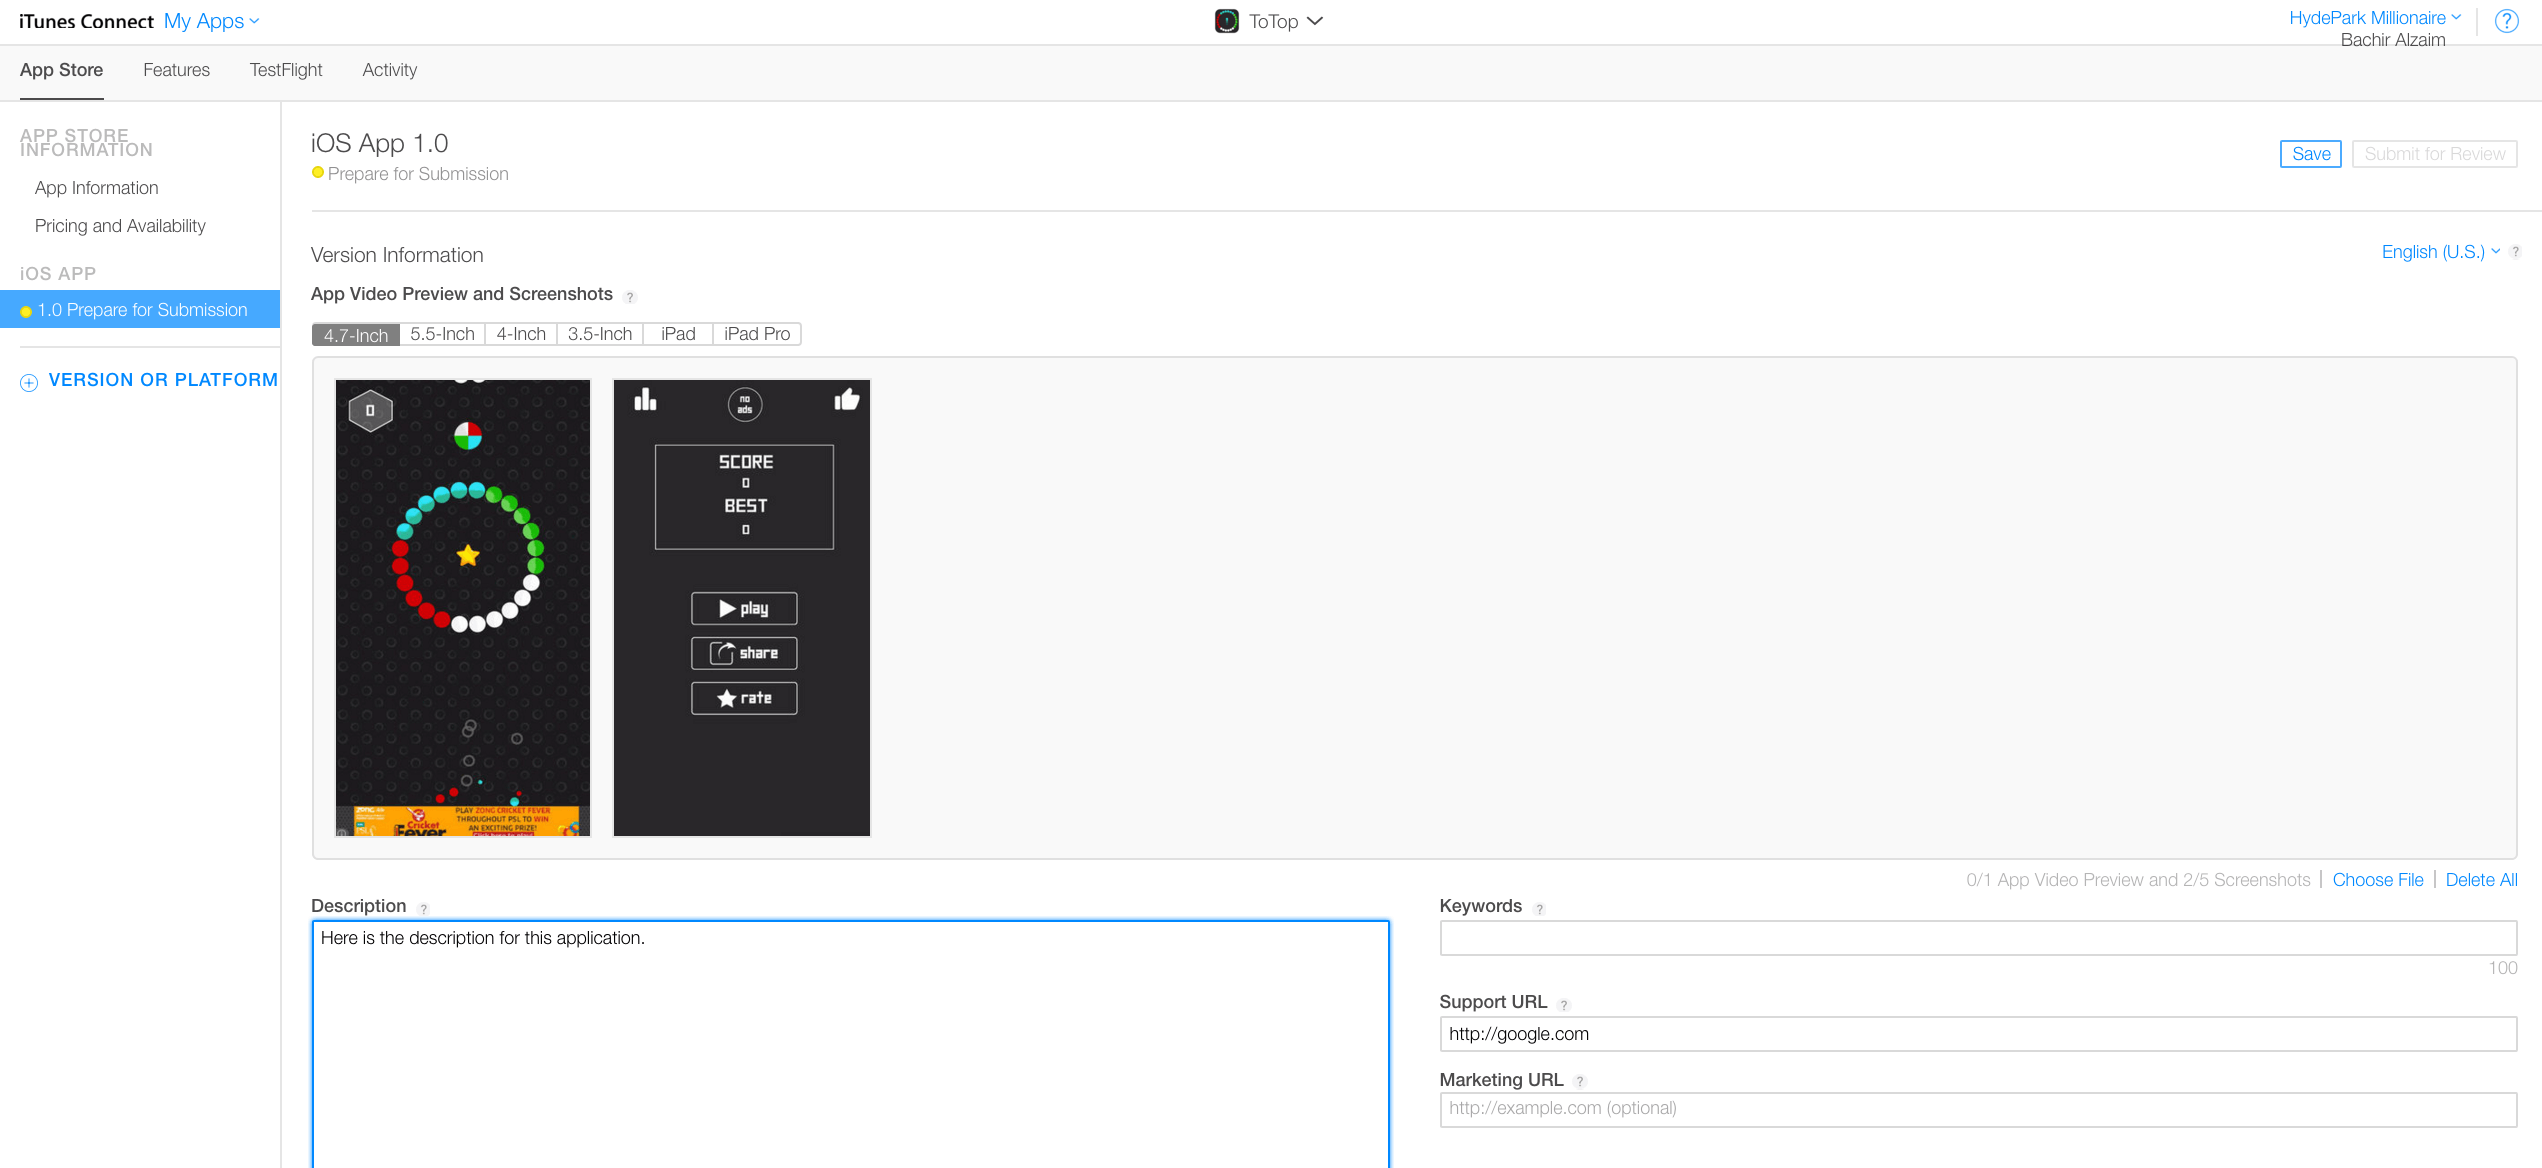
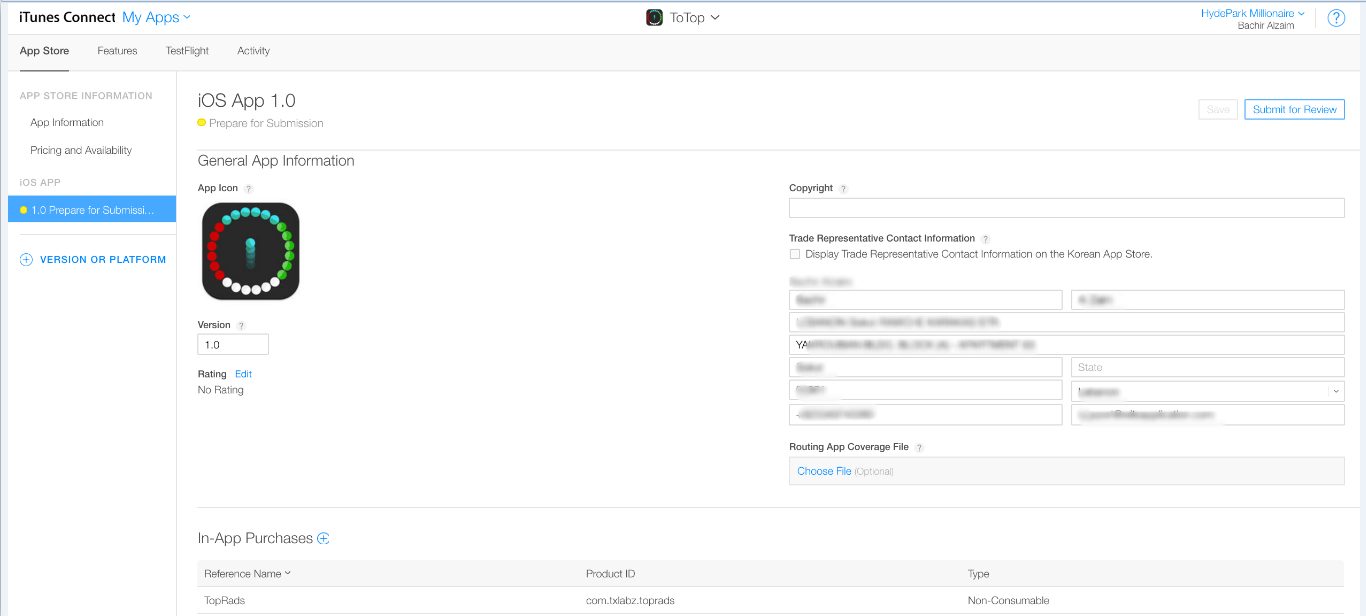
This screen is where you’ll fill in the bulk of the information for your app. It’s extremely helpful to click the little question mark bubble beside each field to get hints about what Apple expects you to fill in for each box.
Create in app Products
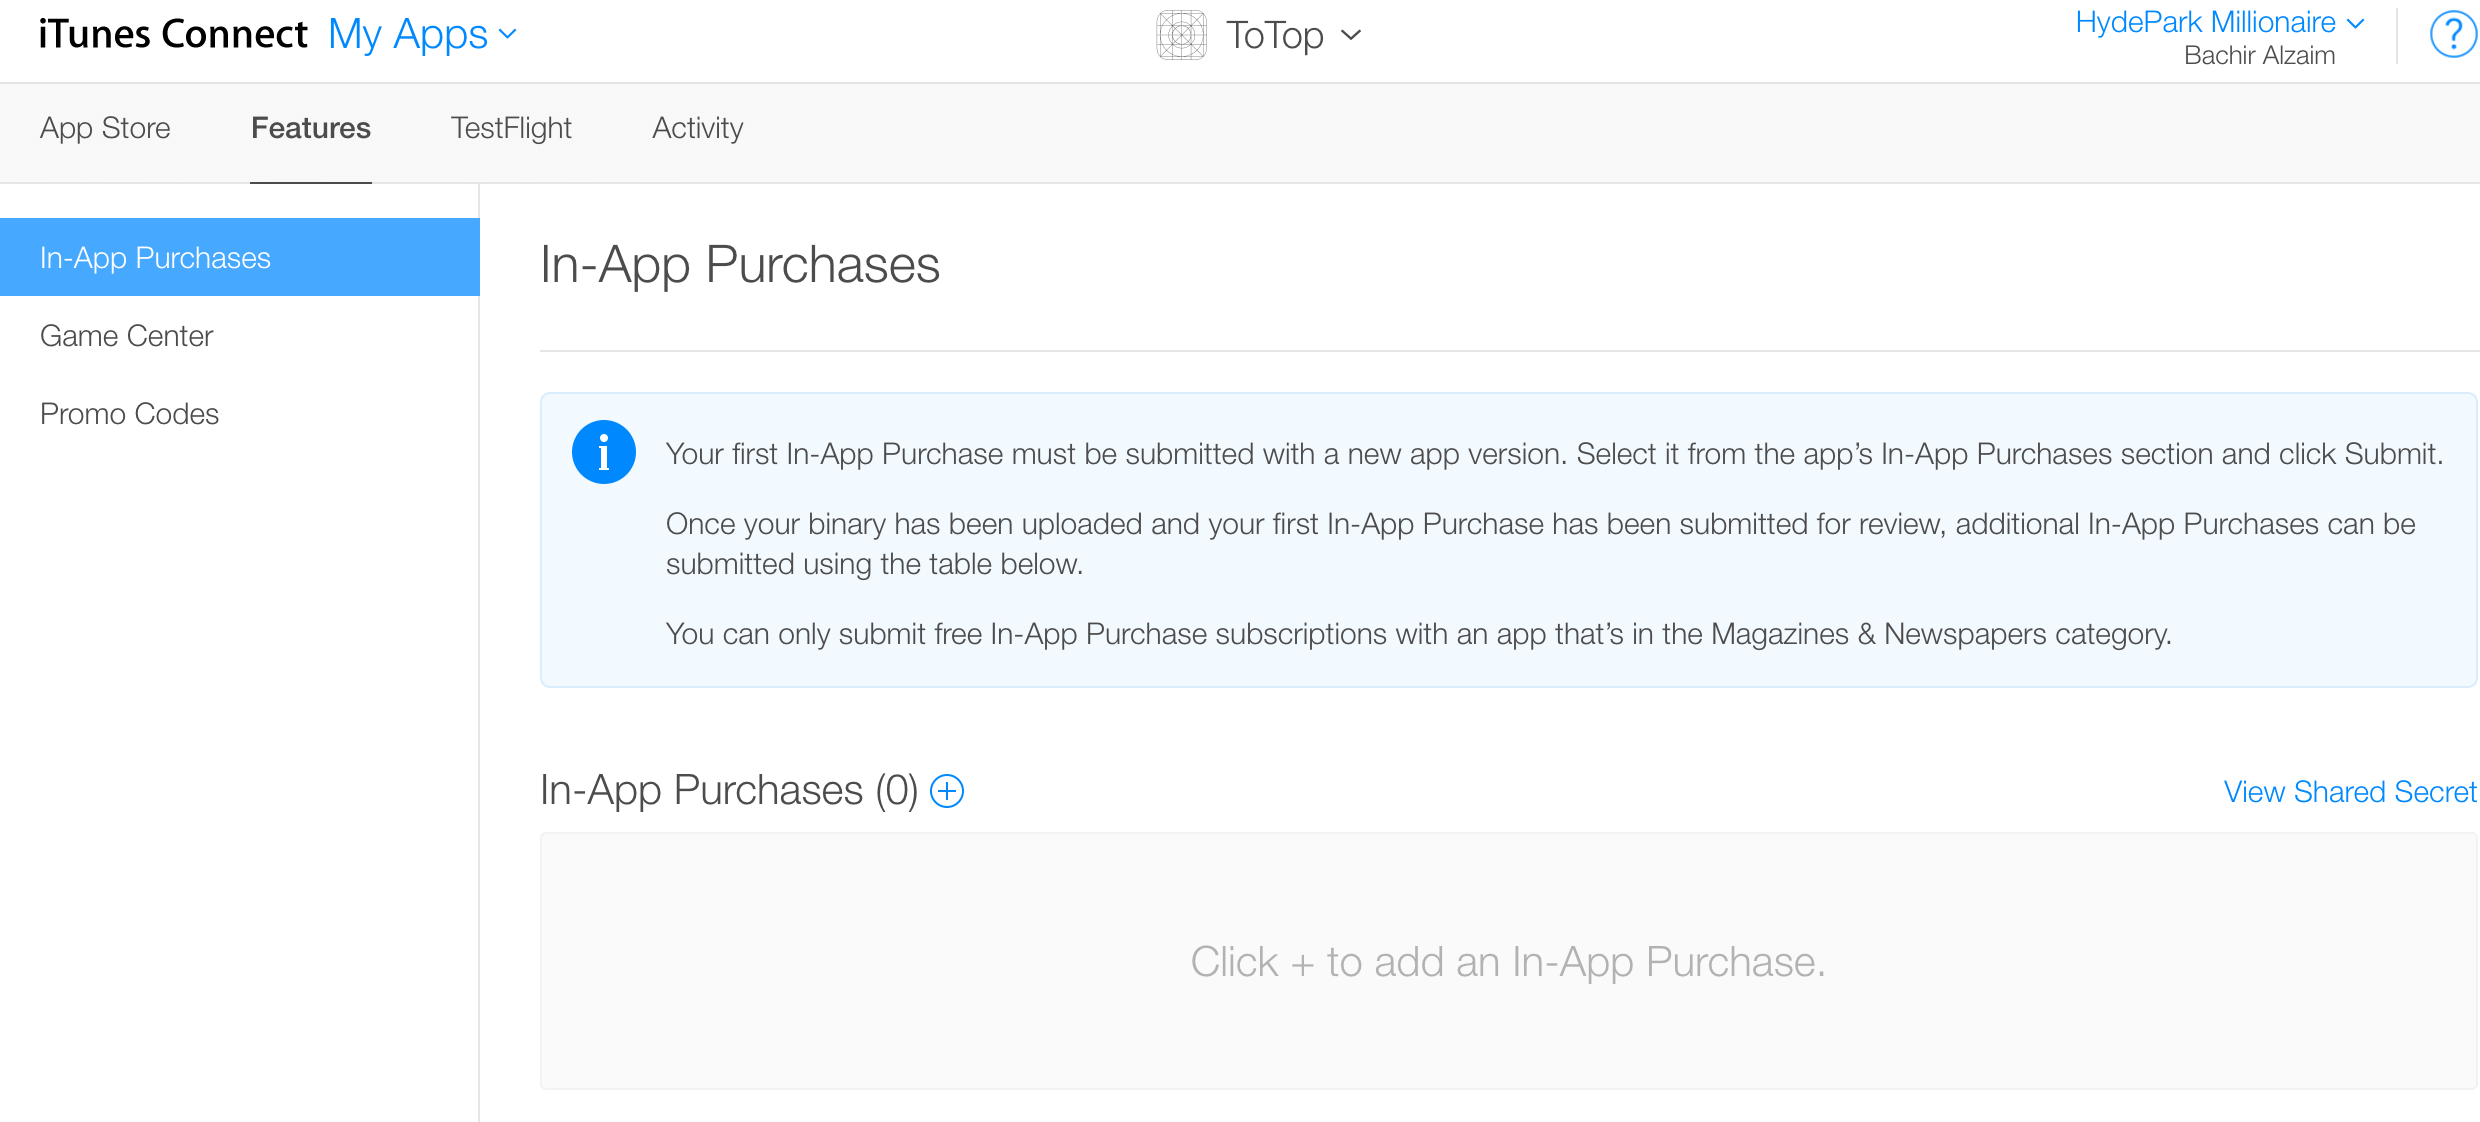
In-App Purchase lets you sell a variety of virtual items directly within your free or paid app. We are going to create non-consumable in app product. On the App Details page, select the version of your app that you are about to release and scroll down to the In-App Purchases section, just below the Builds section. In the In-App Purchase section, click the plus sign.
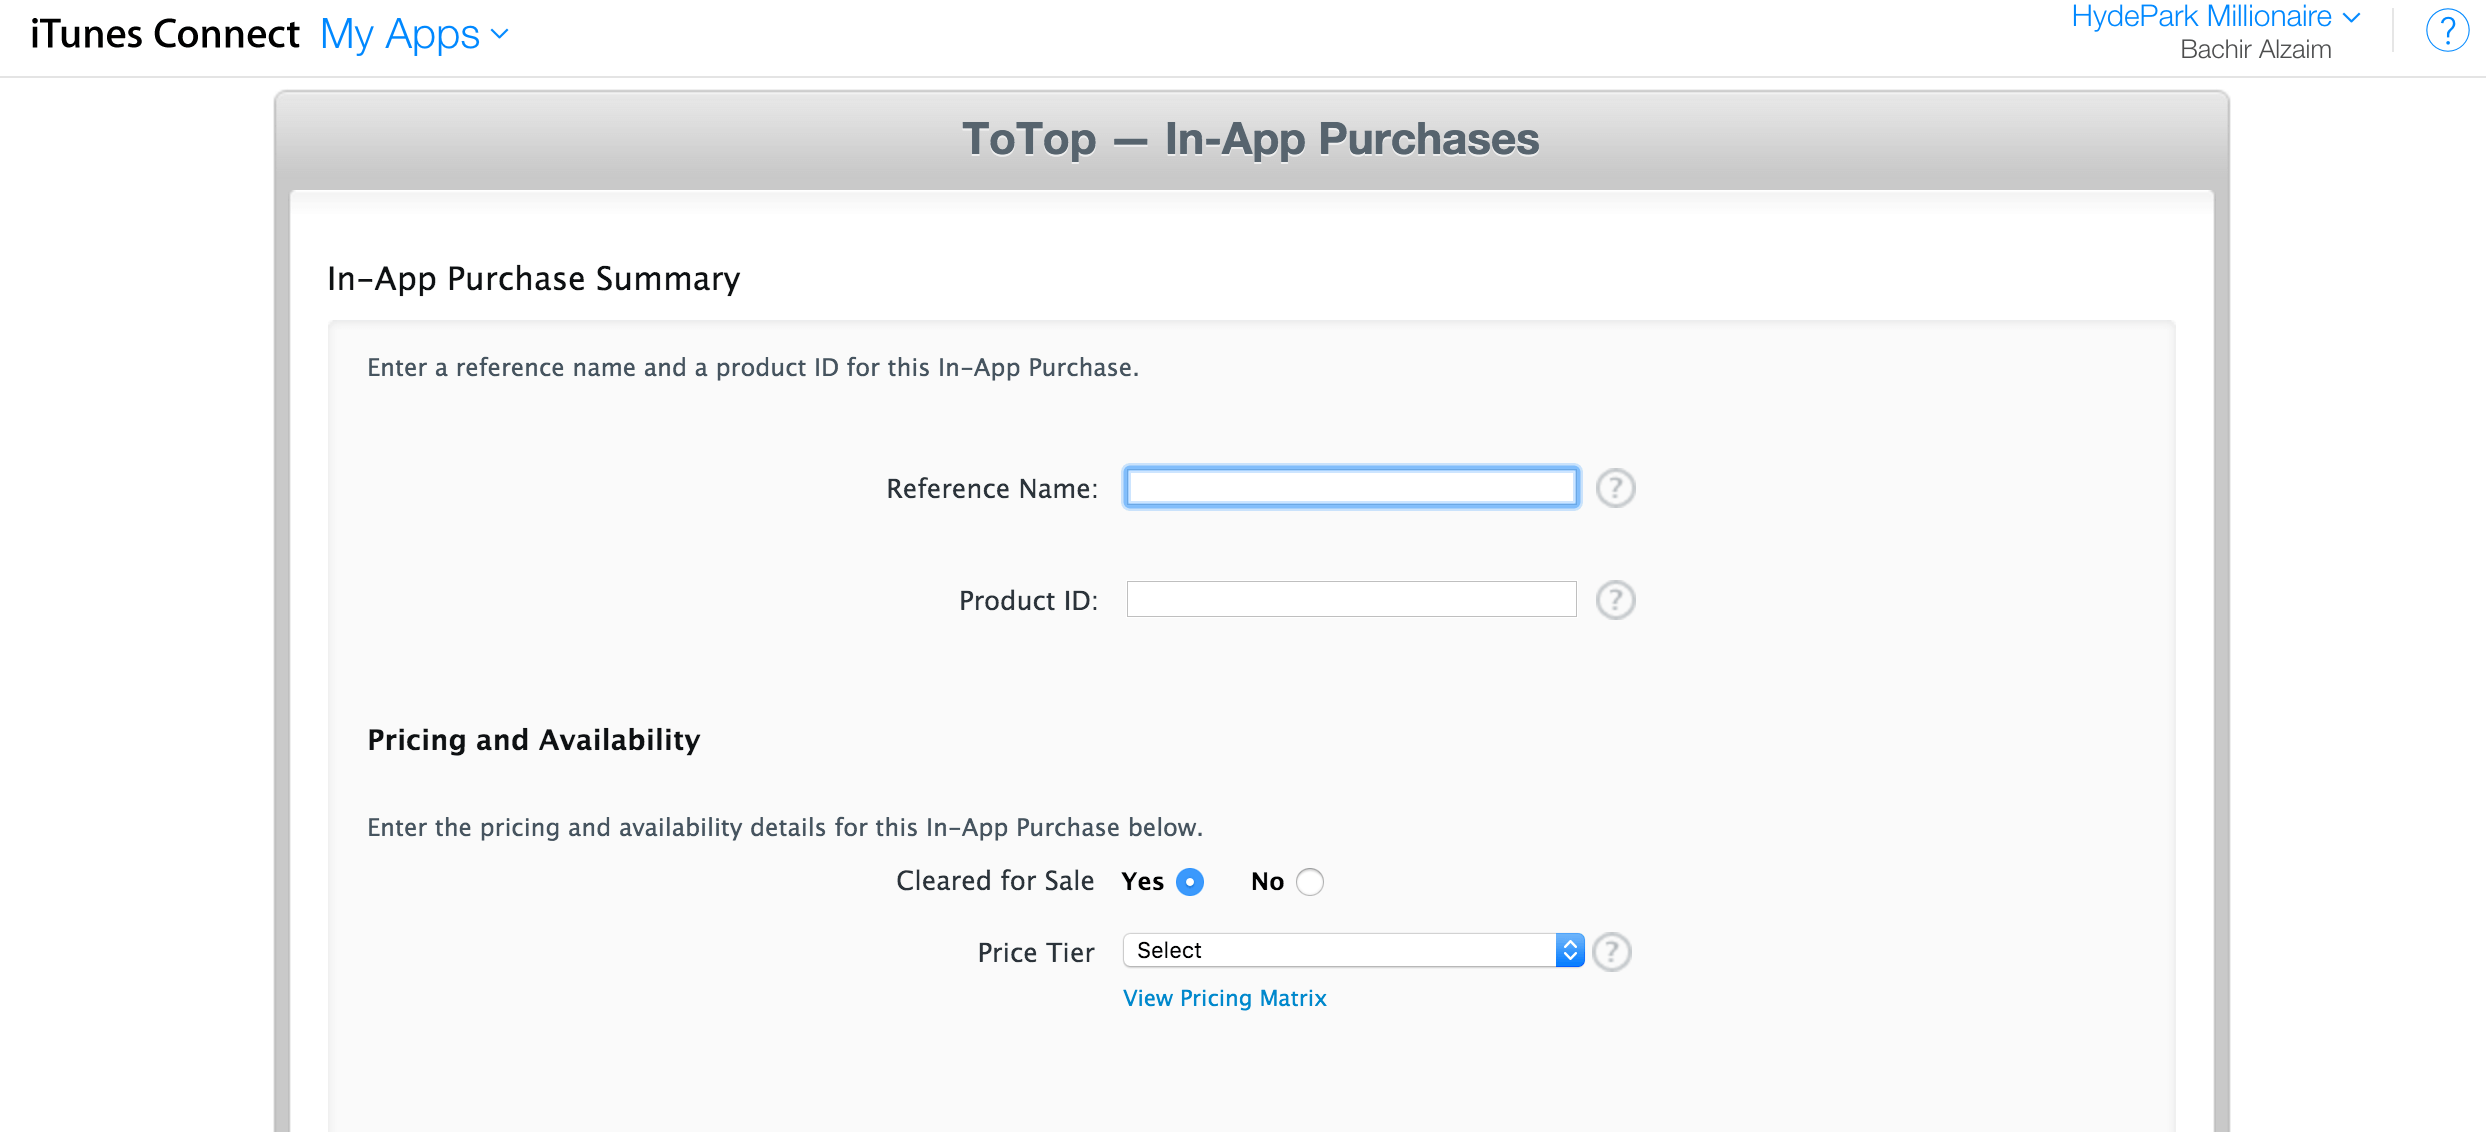
Fill in the required information on following screen
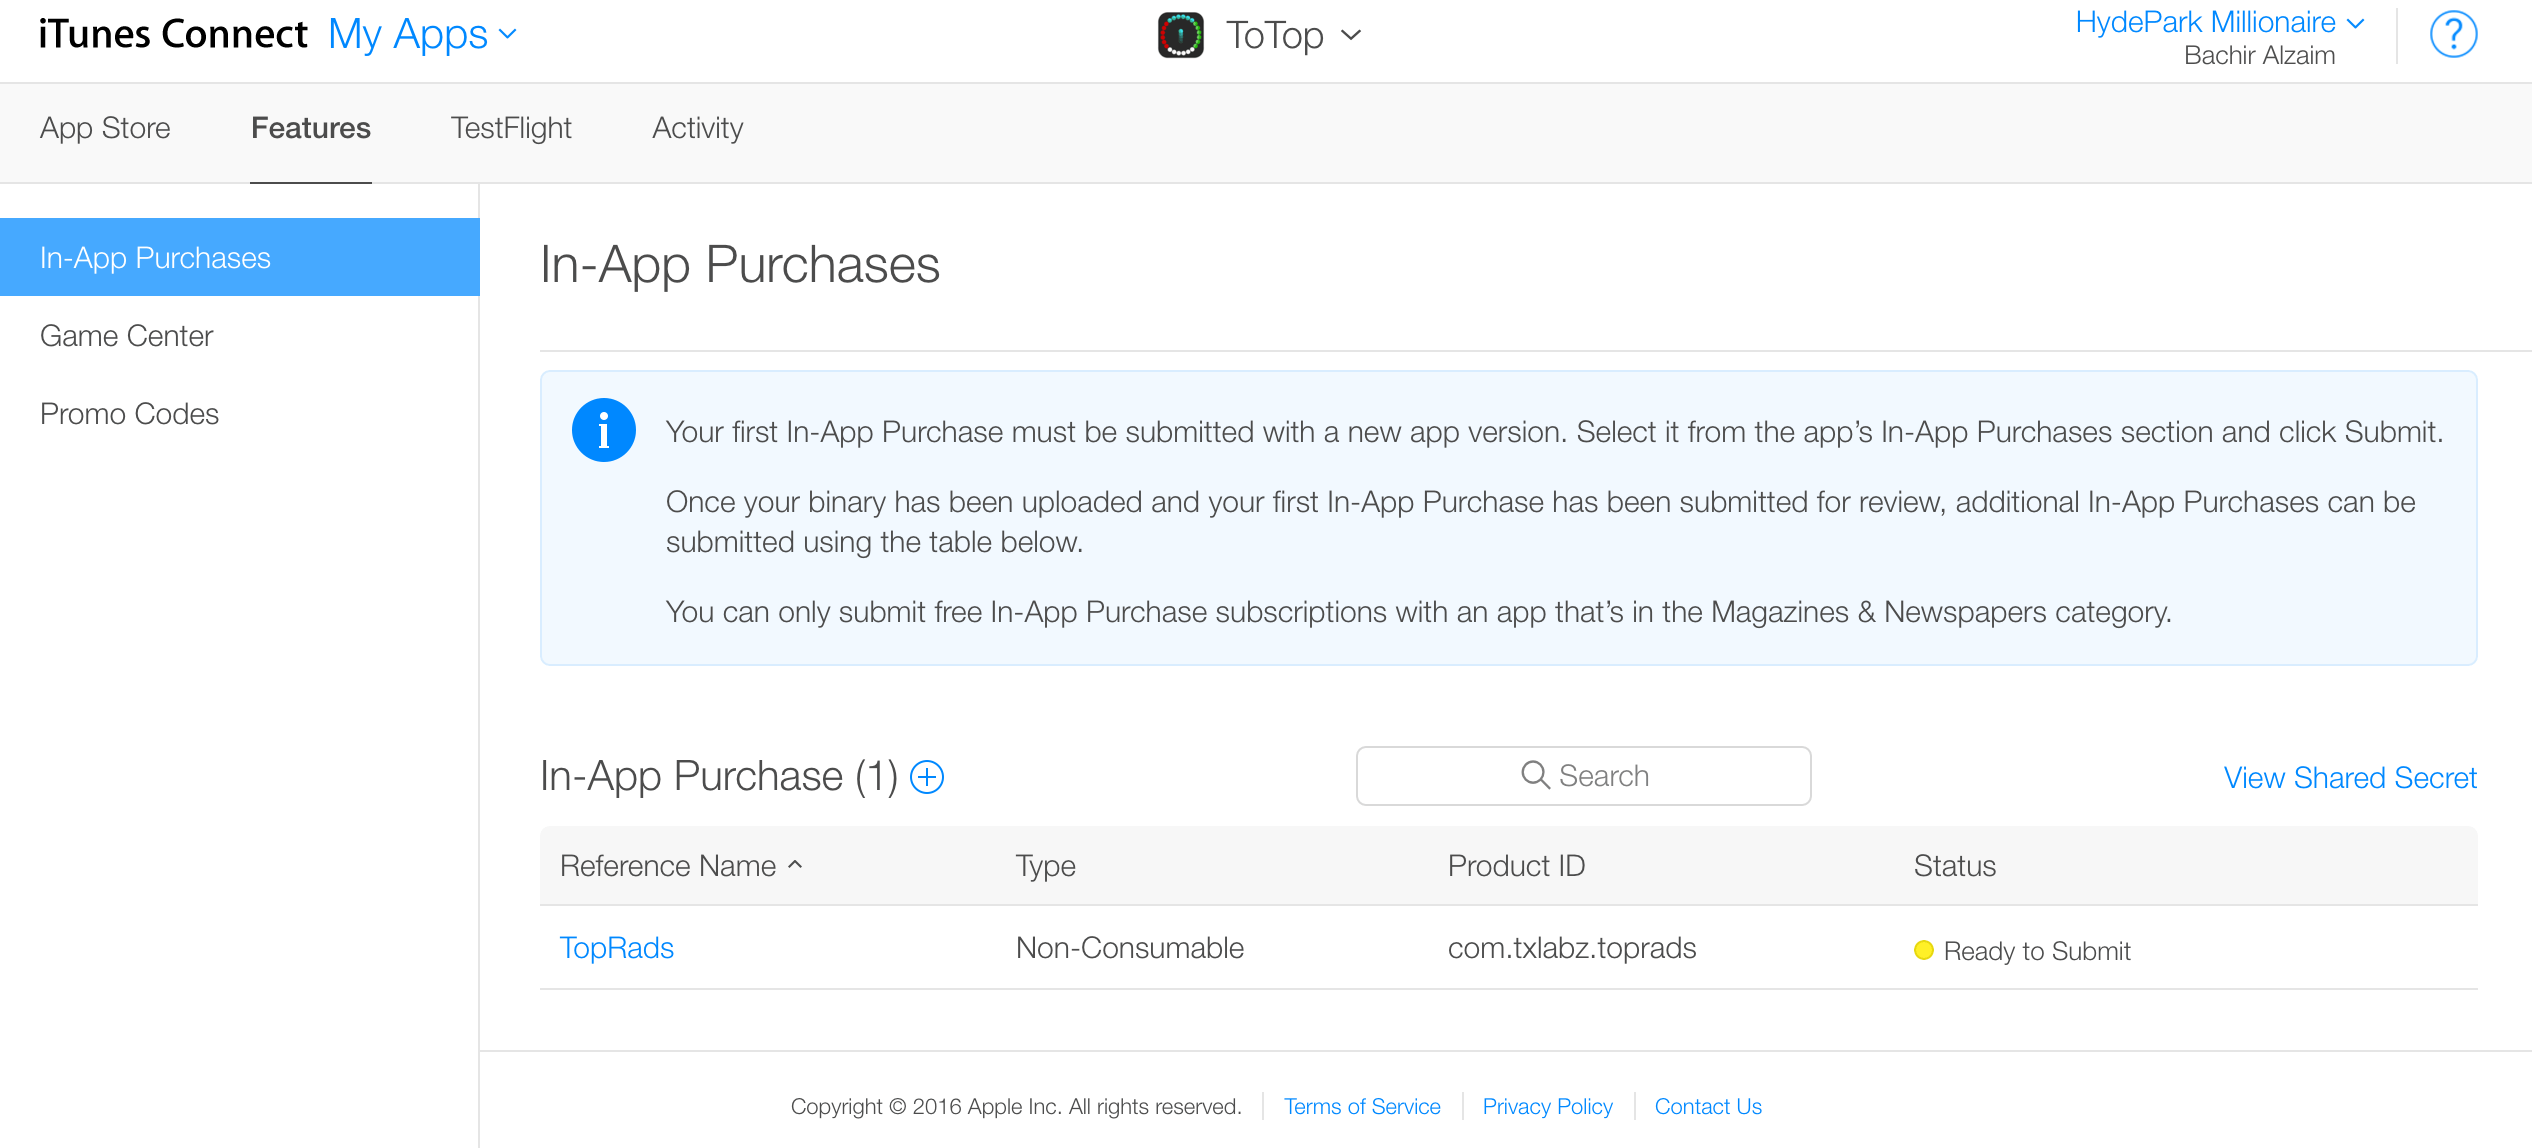
Once in app item is created, it should look like the following screen
Now go back to app detail page and go to in app section, press plus button and select recently created in app product.
Create a Leaderboard
Click feature tab under your app name in top bar and go to Game Center
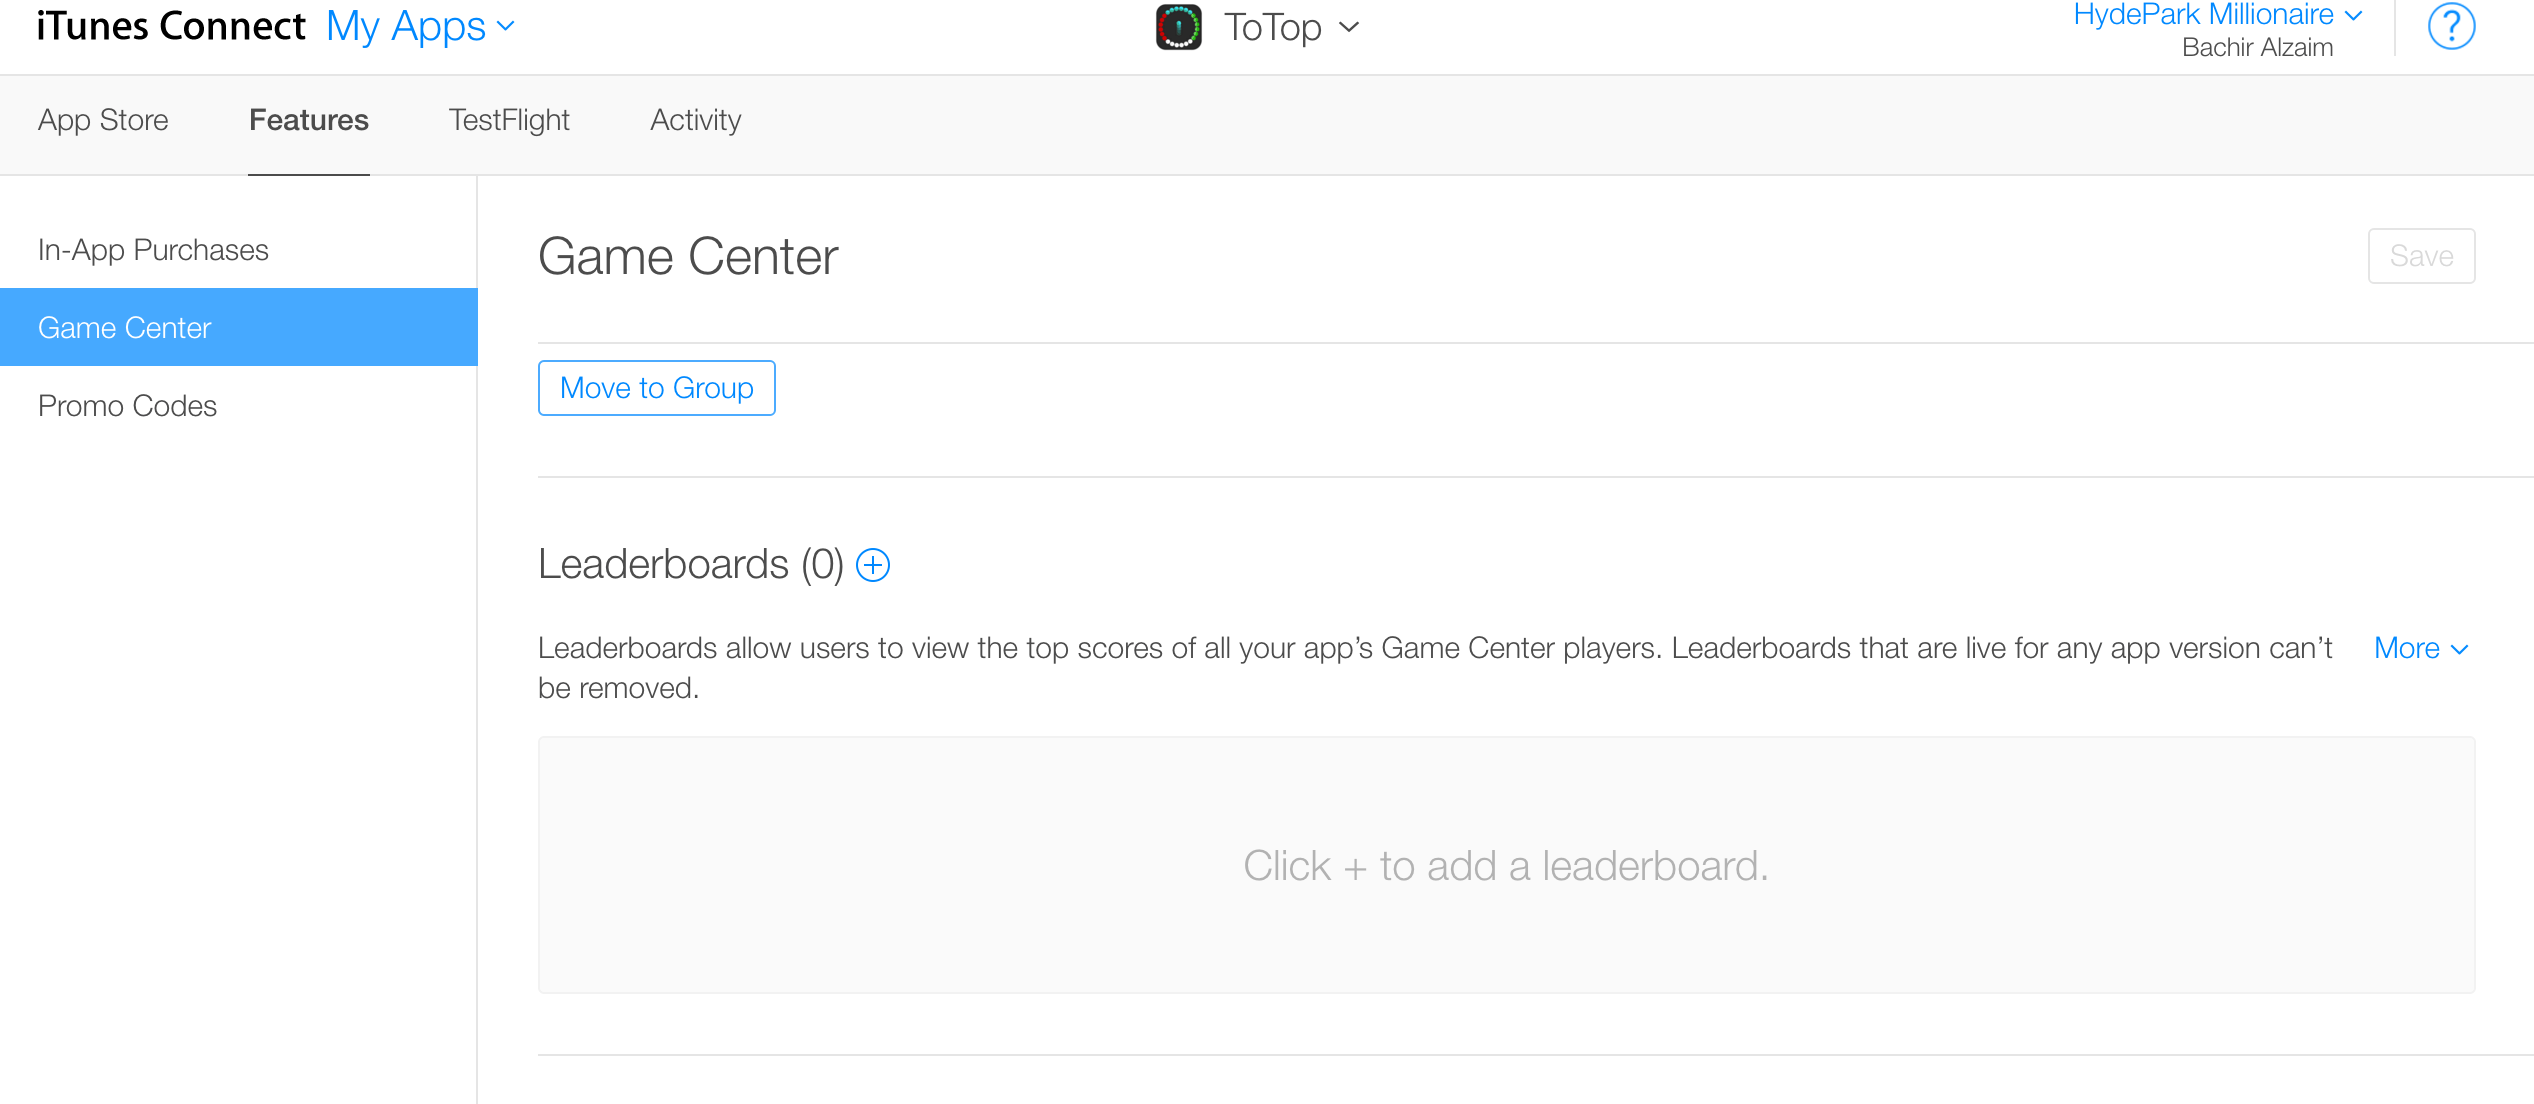
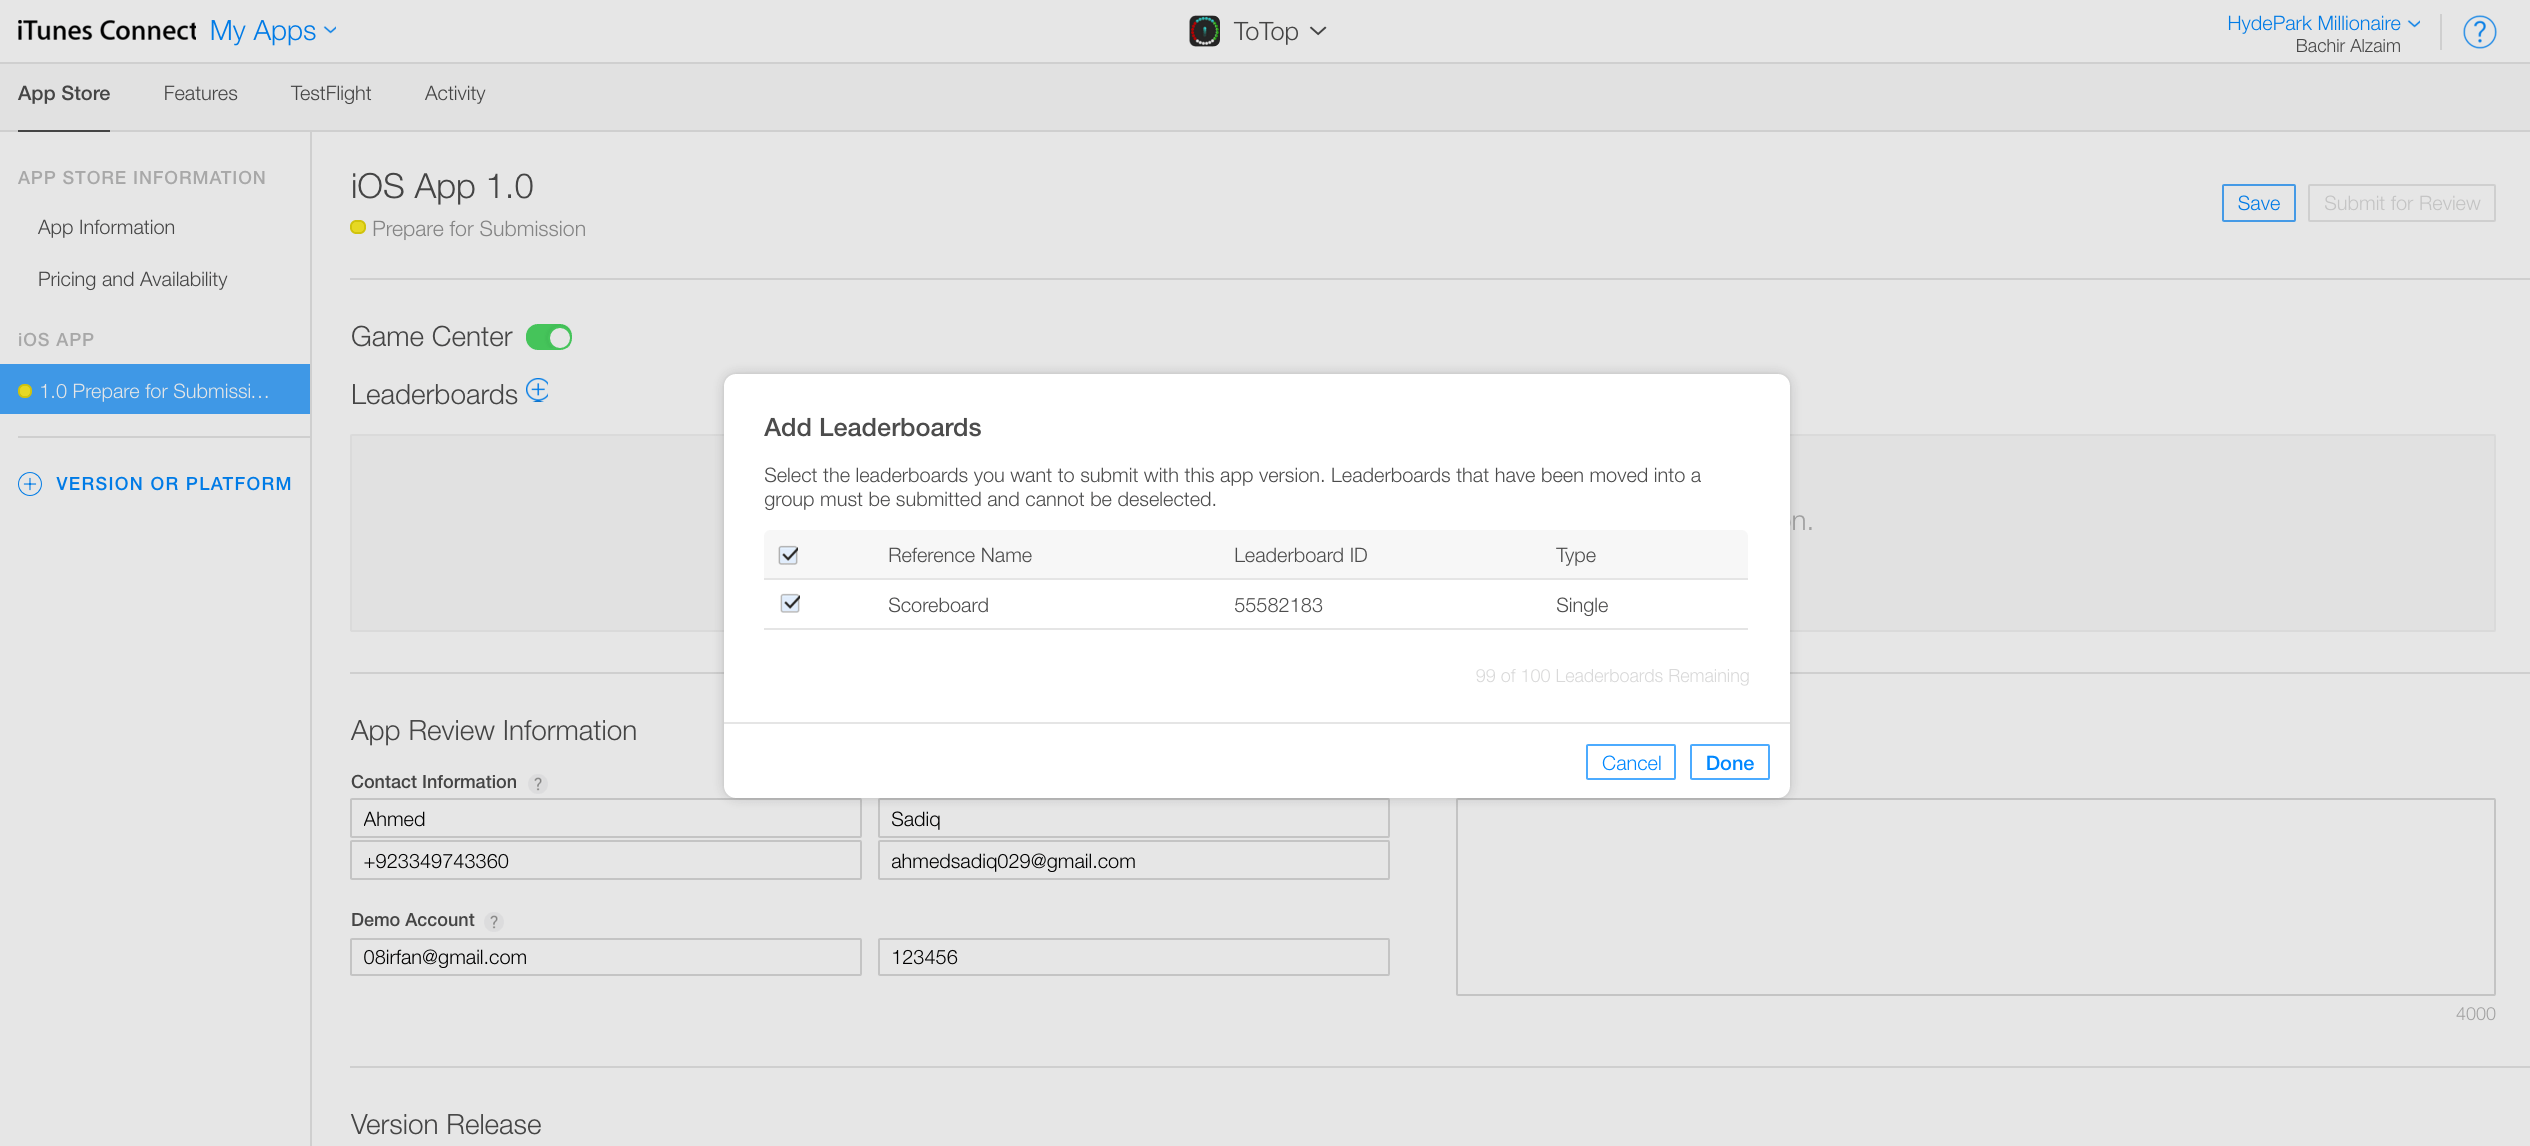
Here, press plus button and create leader board. We are going to select single leaderboard named “Scoreboard” in our game.
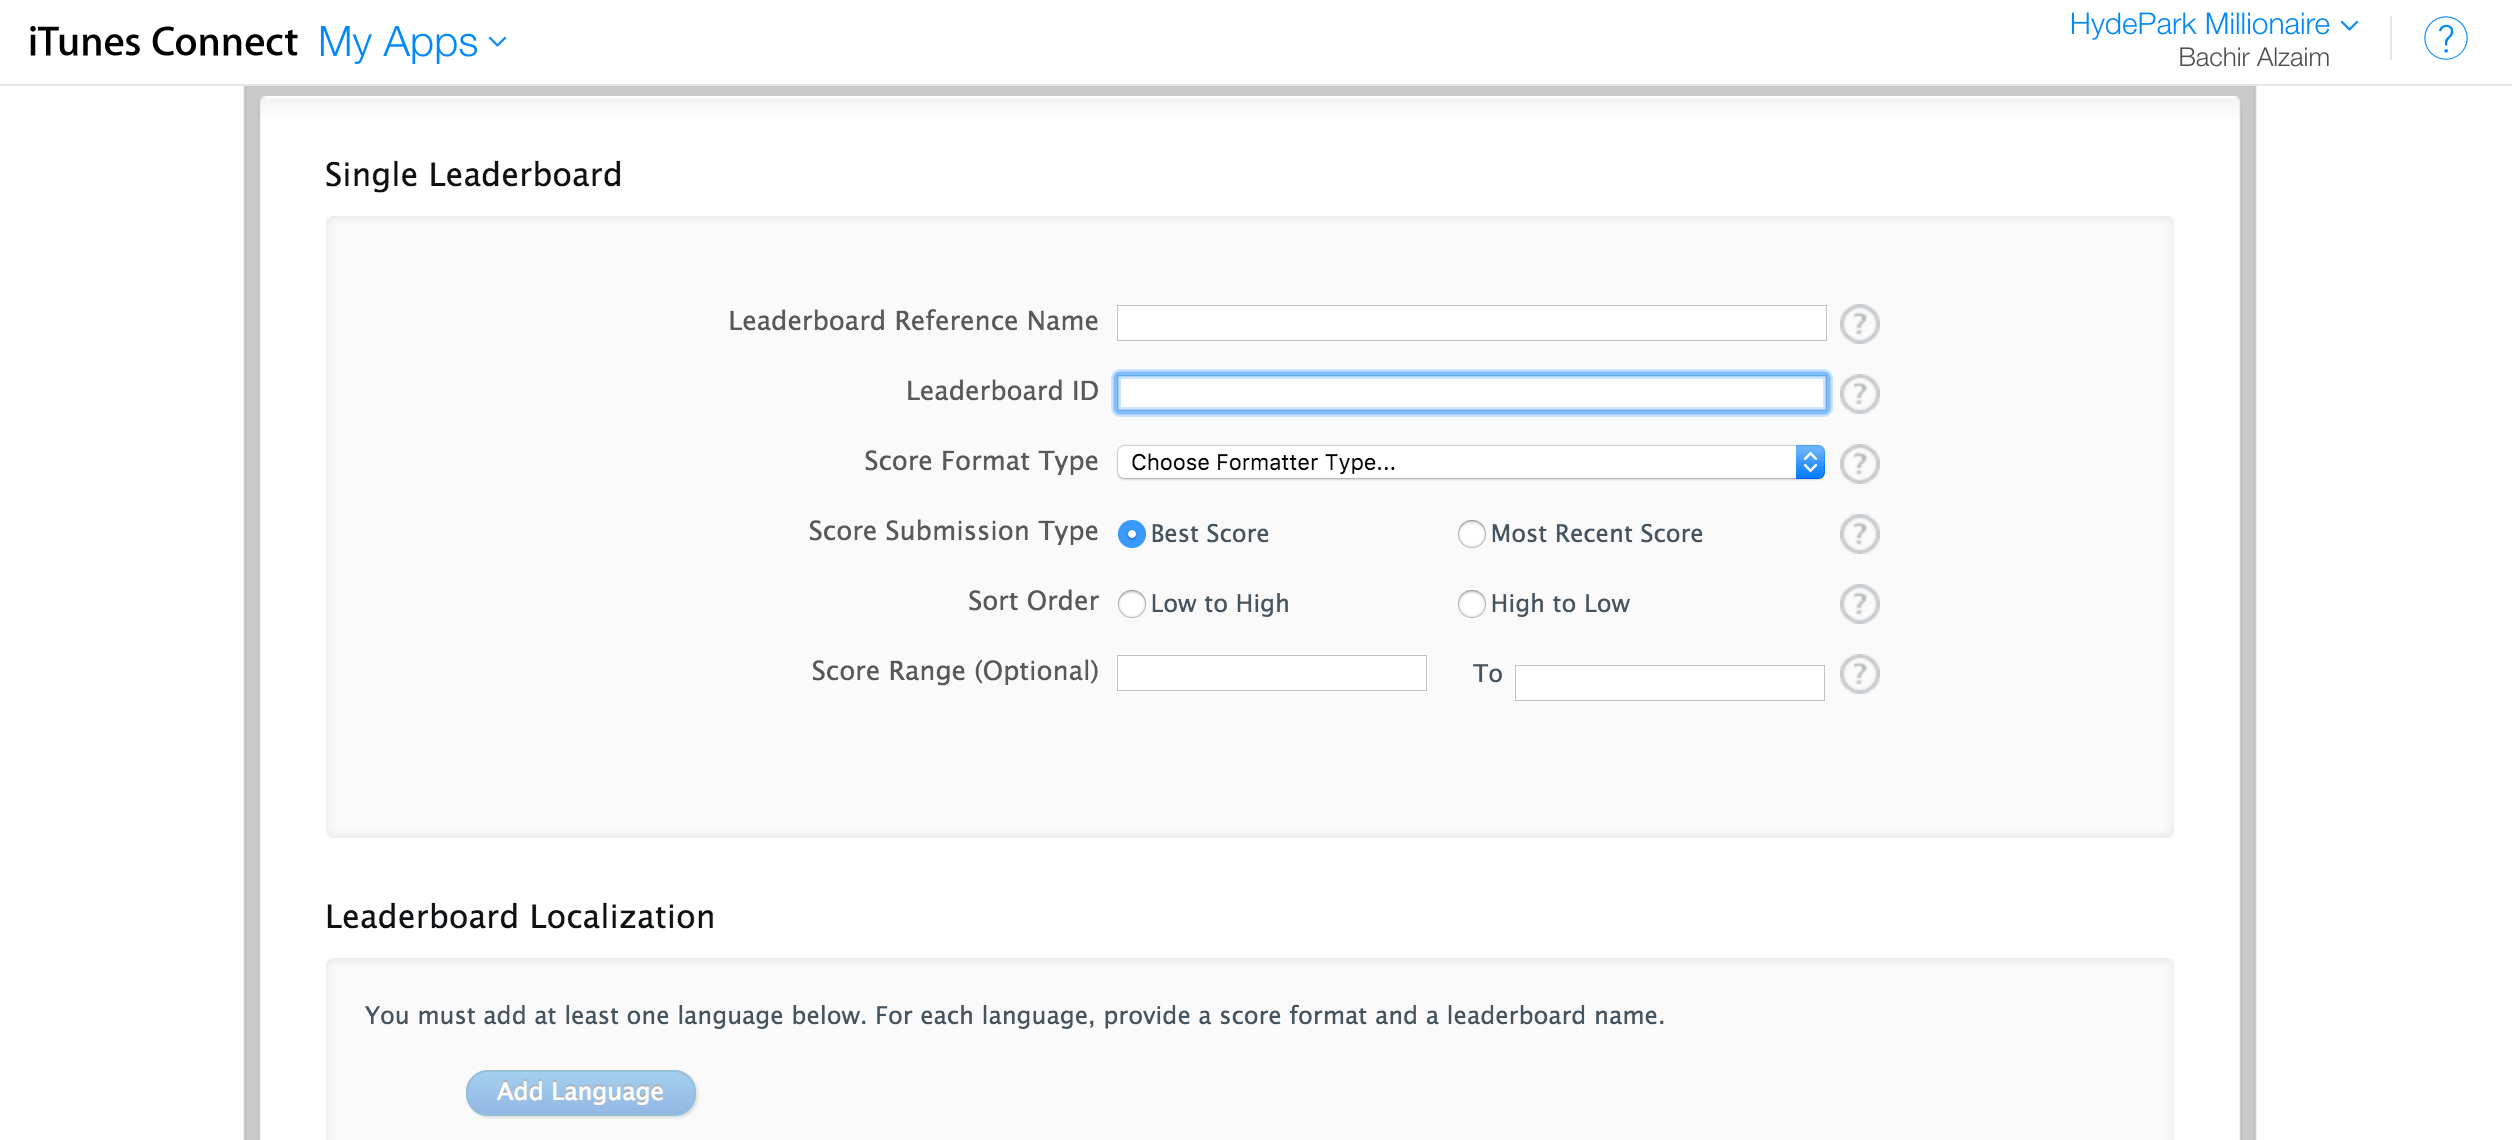
After filling in required information, leaderboard will be created.
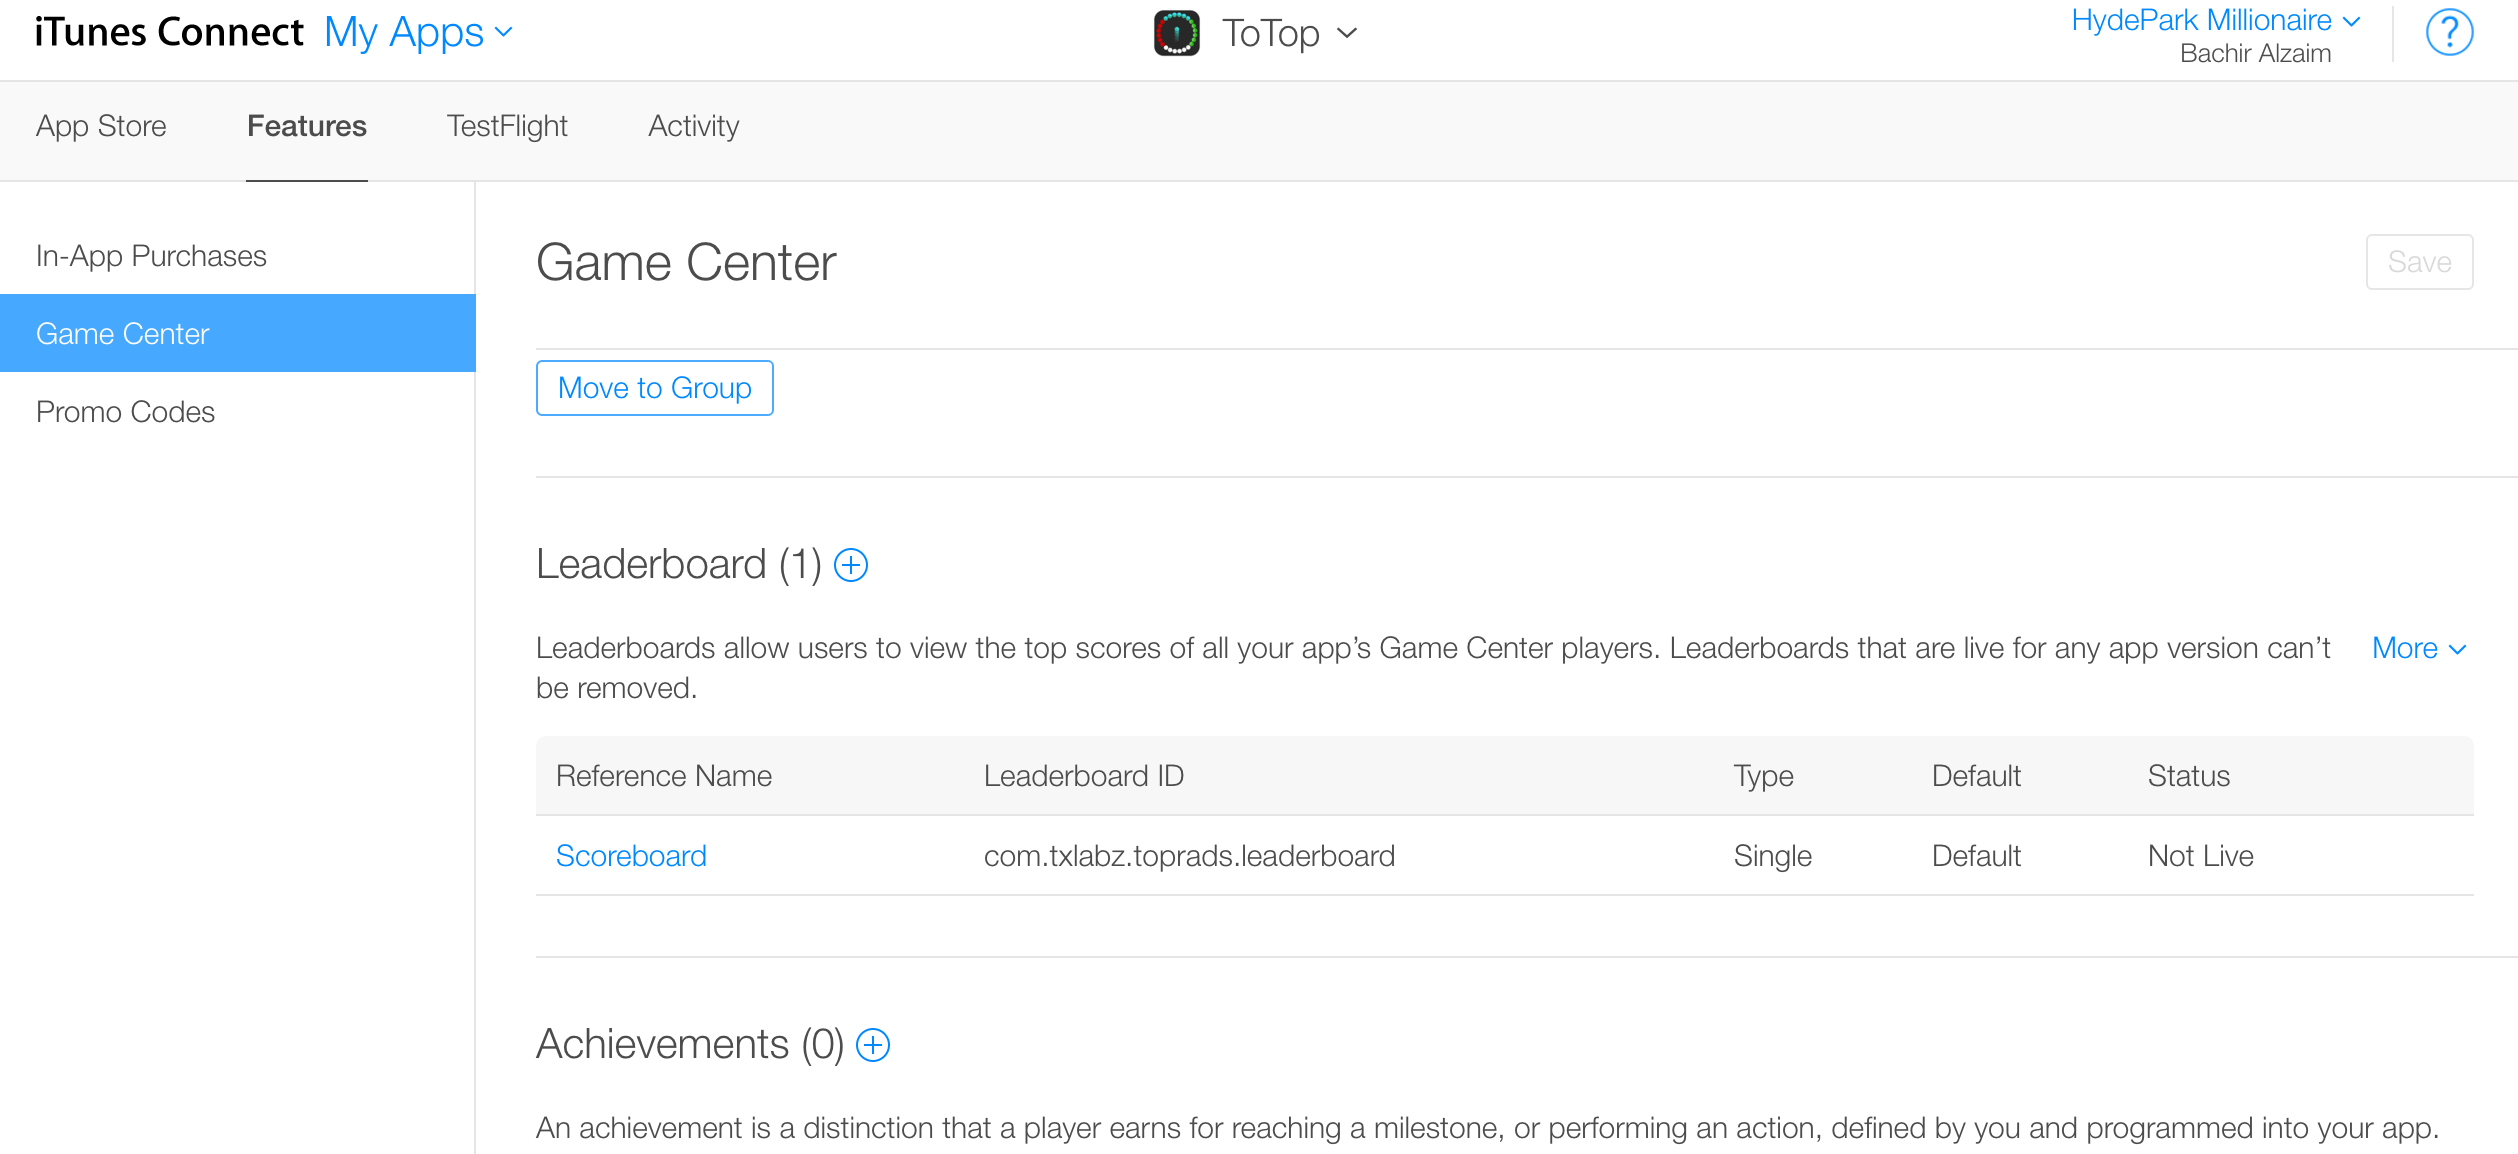
Go back to app detail page, under the section game center, press the toggle button and select newly created leaderboard.
Finally, click Save!
It’ll back out to the saved listing and you’ll see near the bottom that your app has a status of “Prepare for upload”.
Click the app icon to go into the details and in the upper right hand corner, you’ll see a blue button that says Ready to Upload Binary. Click that blue button and you’ll be presented with a few questions.
These questions may change but at the time of this writing, they ask if your app incorporates any encryption, third party content and if you’re utilizing the Advertising Identifier. For encryption, if you didn’t write any code to perform encryption and you didn’t use any of the Objective-C libraries to encrypt data, then select No. For third party content, if your app displays content that doesn’t belong to you (for example, an app that displays YouTube videos), then select Yes. For the Advertising Identifier, if you’re not sure what this is, then you probably didn’t use it and you can select No. Click Save and you’ll see the status change to Waiting For Upload.
Now we go back into Xcode to perform the last step!
Build Submission
- Back in Xcode , open the Organizer if you closed it from the earlier step (pressing SHIFT+CMD+2 or going through the menu Window->Organizer).
- Go to your Archives tab and select the archive that you created earlier for upload.
- Then click Distribute (it’ll run through the validation too).
- Use your iTunes Connect login to sign in and it’ll look to make sure that you created a matching App Listing.
- Then if all goes well with the validation, it’ll proceed to upload the binary for certification!
- After uploading the binary, if you go back to you iTunes Connect account, you’ll see the status of your app is now Waiting for Review.